

Introduction
Nowadays, when all sorts of chat rooms have become extremely popular, when every second large company has launched or developed its own instant messenger, when an increase of smiles and change in the text size is considered as innovation, in the era of iMessages, Slack, Hipchat, Messager, Google Allo, Zulip, etc. I will tell you how to keep up with the trend and write your own chat, using django-channels 0.17.3, django 1.10.x, python 3.5.x.
We will take multichat as an example. This article can be considered as step-by-step instructions on creating such a chat.
Django-channels review
This package allows our application to interact with a user not only using HTTP 1.1 (request-response), but also using HTTP/2 and WebSocket.
WebSocket is designed for exchanging messages between the client and the web server in real time. You should consider it as an open channel between the client and the server, with the ability to subscribe to the events sent to it.
Chat functionality
Let's define the main functions, which our chat app will have.
User authorization will be done on the basis of the built-in django.contrib.auth. Django-channels support cookies-based user authentication, this is what we need.
Separate chat rooms with the possibility of adding, deleting and editing via standard Django admin control panel.
Message delivery in real time, which we will do using django-channels and websocket.
Installation and configuration of the environment
We will use python 3.5.x, but python 2.7 is also supported.
Virtualenv and django project
# We create a virtual environment, project and prepare them for work
$ mkvirtualenv --python=/usr/local/bin/python3 multichat

$ pip install Django==1.11.2 channels==1.1.5
$ django-admin.py startproject multichat  # Don't forget to add the 'channels' to the INSTALLED_APPS

$ cd multichat
$ setvirtualenvproject

$ ./manage.py migrate
$ ./manage.py createsuperuser --username admin --email a@dm.in

$ mkdir templates static  # Do not forget to add them to TEMPLATES and STATICFILES_DIRS respectively
Redis
- Hey, wait a minute! Why do we need Redis? We came here to read about websockets. - The typical reader.
- Django-channels are not only about websockets. - Anonymous
Django-channels consist of three components:
Interface servers- which handle requests (WSGI and ASGI) and put them in a queue.Channels- is a first-in first-out queuefor messages that need to be stored in data structures such asRedis,IPCetc. The message can be delivered only to one listener, message delivery order depends only on its getting into the queue.Workers- monitor channels and handle requests.
For more detailed information, see documentation;
Note that such architecture can scale horizontally the app. You can vary the number of processes for each component and run them on separate servers.
Let’s configure django-channels so that it will use the above-mentioned redis as the channel storage.
$ pip install asgi_redisWe will add the following lines to multichat/settings.py:
redis_host = os.environ.get('REDIS_HOST', 'localhost')

# Channel layer definitions
# http://channels.readthedocs.org/en/latest/deploying.html#setting-up-a-channel-backend
CHANNEL_LAYERS = {
    "default": {
        # This example app uses the Redis channel layer implementation asgi_redis
        "BACKEND": "asgi_redis.RedisChannelLayer",
        "CONFIG": {
            "hosts": [(redis_host, 6379)],
        },
       "ROUTING": "multichat.routing.channel_routing", # We will create it in a moment
    },
}
We will create multichat/routing.py (next to settings.py) and add a basic message handler. For example we will display text of a received message in the console. The file will look like this:
from channels import route


# This function will display all messages received in the console
def message_handler(message):
    print(message['text'])


channel_routing = [
    route("websocket.receive", message_handler)  # we register our message handler
]
Also, it was needed to initialize the django-channels routing.
Now let’s make a digression and check whether it all works.
For this we will need any websocket client.
$ pip install websocket-clientNow let’s run the Django web server ./manage.py runserver, as well as open the interactive session interpreter in a parallel window:
First of all, let’s join our websocket, django-channels runs it by default on the same the url, but the protocol ws/wss is used depending on whether encryption is used or not, so in our case the address of the connection is ws://localhost:8000. We are connecting:
>>> import websocket
>>> ws = websocket.WebSocket()
>>> ws.connect("ws://localhost:8000")
If we take a look at our web server logs, we'll see something like this:
[2016/11/22 12:04:51] WebSocket CONNECT / [127.0.0.1:55905]So it means we have successfully connected. Now, let’s try to send a message:
>>> ws.send('Hello')As we can see, the message has been duplicated in our server log:
[2016/11/22 12:04:51] WebSocket CONNECT / [127.0.0.1:55905]
Hello
Profit!
Authorization
Let’s create a template for our future application:
$ ./manage.py startapp chatNow let’s add it to the INSTALLED_APPS:
INSTALLED_APPS = (
    # ...
    'chat',
)
Then, add a base template and some styles.
Create static/main.css style file with the following content.
It is now up to the basic template templates/base.html:
{% load staticfiles %}
<!DOCTYPE html>
<html>

<head>
  <title>{% block title %}{% endblock %}</title>
  <meta charset="UTF-8">
  <link rel="stylesheet" href="{% static " main.css" %}" type="text/css" media="screen" />
  {% block extra_head %}{% endblock %}
</head>

<body>
  <header>
    <h1>{% block header_text %}{% endblock %}</h1>
    {% if user.is_authenticated %}
    <a href="{% url 'logout' %}">Logout</a>
    {% endif %}
  </header>
  <section>
    {% block content %}
    {% endblock %}
  </section>
  {% block extra_body %}{% endblock %}
</body>

</html>
We will expand it later.
Let’s work with a homepage, we will create a template templates/index.html for it:
{% extends "base.html" %}

{% block title %}MultiChat Example{% endblock %}
{% block header_text %}MultiChat Example{% endblock %}
But so that we could get to it, let's add a corresponding view in the chat/views.py, here's what you should get in the end:
from django.shortcuts import render
from django.contrib.auth.decorators import login_required


@login_required
def index(request):
    """
    Root page view. This is essentially a single-page app, if you ignore the
    login and admin parts.
    """
    # Render that in the index template
    return render(request, "index.html")
Now let's add it to the multichat/urls.py:
from django.conf.urls import url
from django.contrib import admin

from chat.views import index


urlpatterns = [
    url(r'^$', index, name='homepage'),  # The start point for index view
    url(r'^admin/', admin.site.urls),  # etc :D
]
We have a homepage. For logout and login we use the built-in view from contrib.auth:
from django.conf.urls import url
from django.contrib import admin
from django.contrib.auth.views import login, logout

from chat.views import index


urlpatterns = [
    url(r'^$', index, name='homepage'),  # The start point for index view
    url(r'^accounts/login/$', login, name='login'),  # The base django login view
    url(r'^accounts/logout/$', logout, name='logout'),  # The base django logout view
    url(r'^admin/', admin.site.urls),  # etc :D
]
By default, django.contrib.auth.views.login view uses a template registration/login.html, which we have not set yet. We’ll create templates/registration/login.html with the following content:
{% extends "base.html" %}

{% block title %}Login{% endblock %}
{% block header_text %}Login{% endblock %}

{% block content %}

  {% csrf_token %}
  {{ form }}
  Login

{% endblock %}
Now, to enable the user to get on the home page after logging in, we need to add the following line in the multichat/settings.py:
LOGIN_REDIRECT_URL = "/"
The same for logout:
LOGOUT_REDIRECT_URL = "/"
That’s all. Let's go to the main page and verify our authorization, enter your user data which was created earlier:
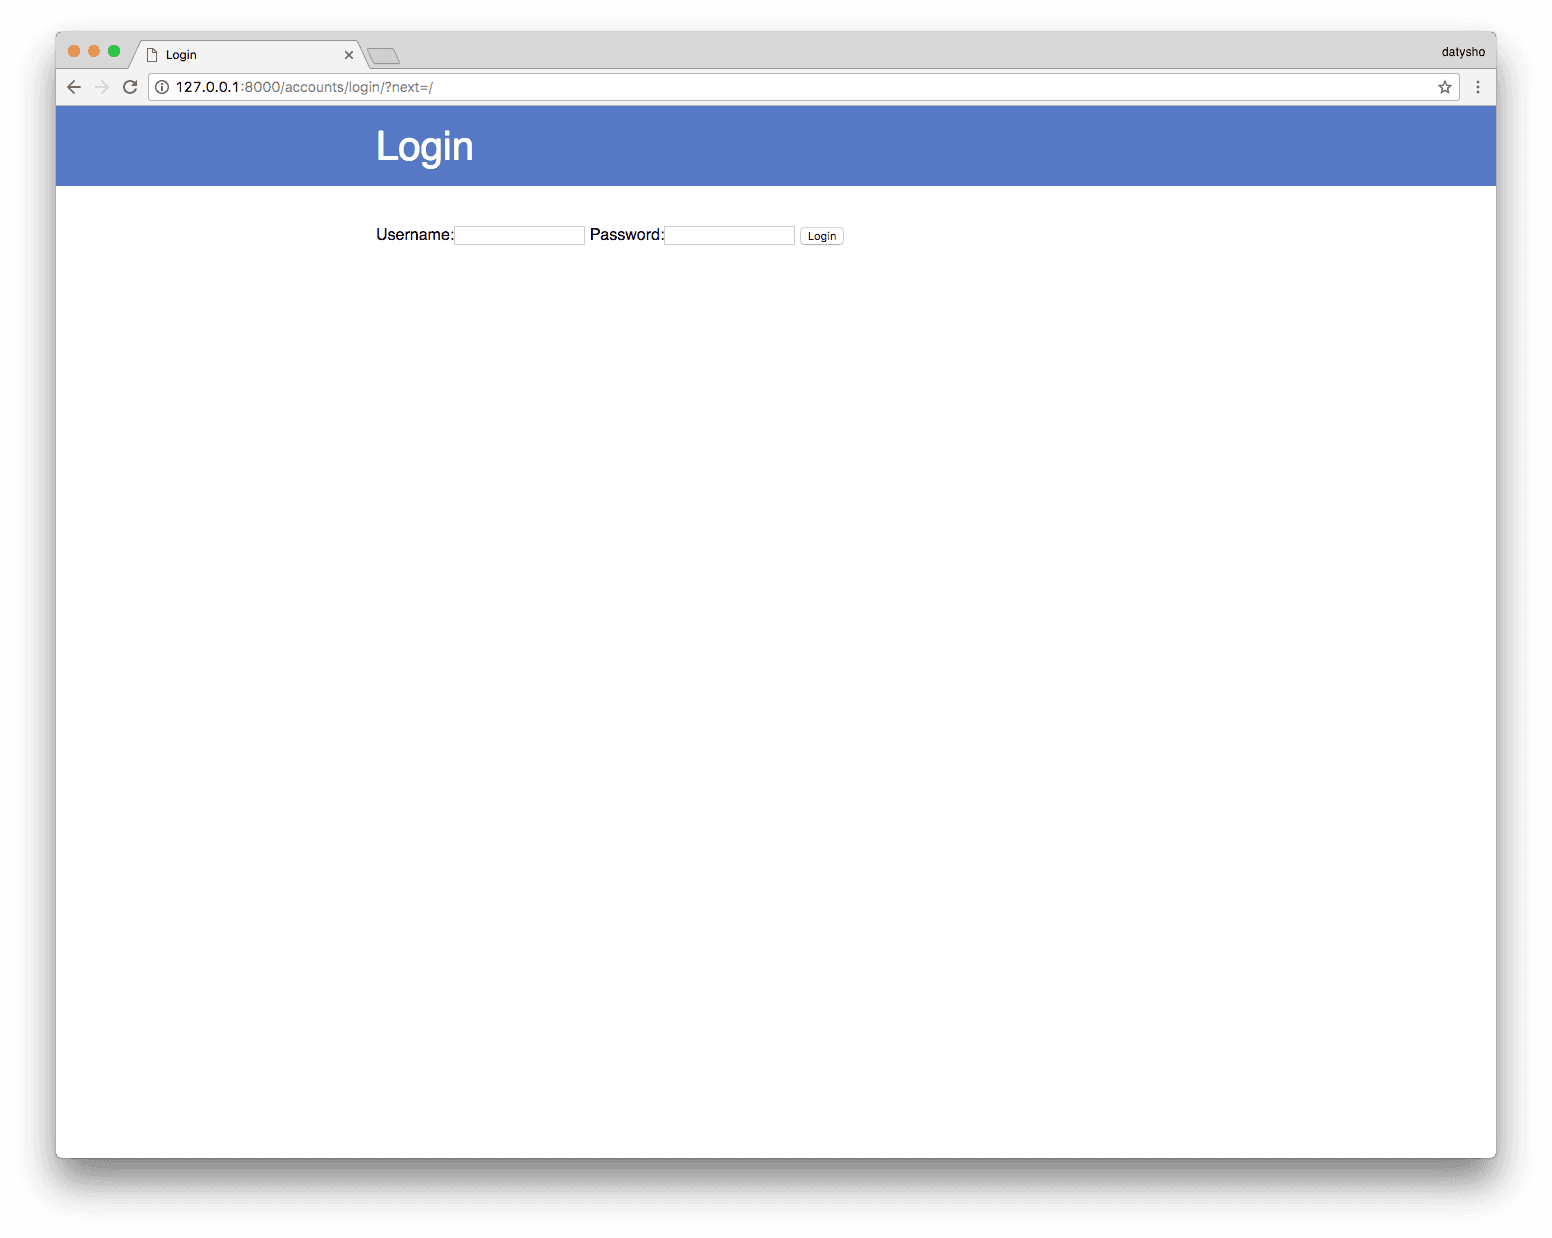
Voila:
Rooms
Let's talk about rooms, each room can have its own name, also it would be nice to be able to create separate rooms where only superusers can enter. Let’s add a ‘Room’ class to chat/models.py:
from django.db import models
from django.utils.six import python_2_unicode_compatible


@python_2_unicode_compatible
class Room(models.Model):
    """
    A room for people to chat in.
    """

    # Room title
    title = models.CharField(max_length=255)

    # If only "staff" users are allowed (is_staff on django's User)
    staff_only = models.BooleanField(default=False)

    def str(self):
        return self.title
Create and run the migrations:
$ ./manage.py makemigrations chat
$ ./manage.py migrate chat
It would be nice to provide the possibility of adding them, for this we can certainly create a separate page, provide access rights etc., but it is easier to just use django admin control panel. Add the following line in the chat/admin.py:
from django.contrib import admin

from .models import Room


admin.site.register(
    Room,
    list_display=["id", "title", "staff_only"],
    list_display_links=["id", "title"],
)
Voila, now we can create, edit and delete via django standard admin control panel.
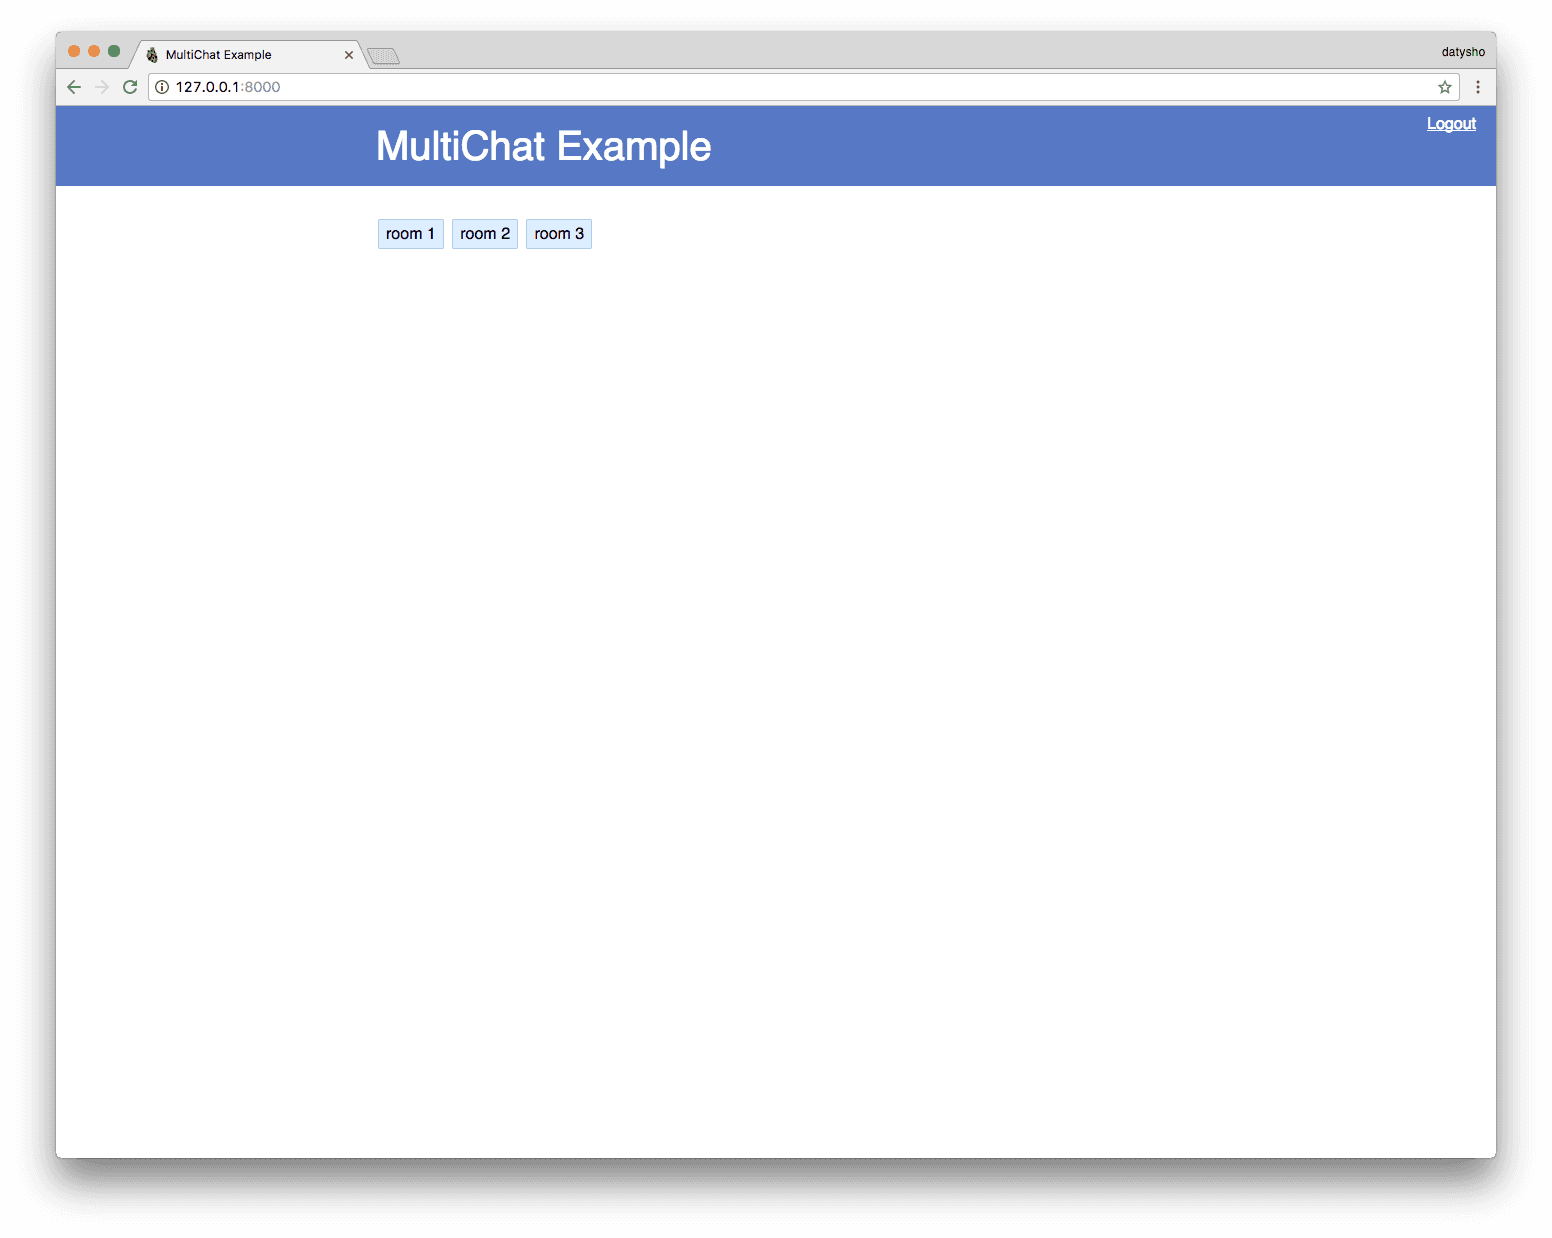
Let’s add displaying of registered rooms list on our home page, for this we add a queryset with rooms to the home page context:
from django.shortcuts import render
from django.contrib.auth.decorators import login_required

from .models import Room


@login_required
def index(request):
    """
    Root page view. This is essentially a single-page app, if you ignore the
    login and admin parts.
    """
    # Get a list of rooms, ordered alphabetically
    rooms = Room.objects.order_by("title")

    # Render that in the index template
    return render(request, "index.html", {
        "rooms": rooms,
    })
Then we can display them in the templates/index.html (do not forget to envisage the absence of rooms, in this case you can simply ask the user to add them with reference to django):
{# ... #}

{% block content %}

<ul class="rooms">
  {% for room in rooms %}
  <li class="room-link" data-room-id="{{ room.id }}">{{ room }}</li>
  {% empty %}
  <p class="empty">No chat rooms defined. Maybe make some in the <a href="{% url 'admin:index' %}">admin</a>?</p>
  {% endfor %}
</ul>

<div id="chats">
</div>

{% endblock %}
Event handlers
The handlers may include such events as: a user connection or disconnection from the websocket, data sending to the websocket. We also need to keep track of when the user logs into the chat, disconnects from it and sends a message.
User connects to the websocket
When a user connects to the websocket, first of all we have to identify it. In this case there is a decorator channel_session_user_from_http in the django-channels arsenal, but how does it work? This decorator takes a user from http session and inserts it into the channel-base session (which uses the django standard SESSION_ENGINE documentation), after which it will be available in the message.user attribute.
We must also take care of creating a channel_session rooms for the user. It is necessary to be able to subscribe the user to the events in a particular room.
To do this, we’ll create a chat/consumers.py file and declare ws_connect function in it:
from channels.auth import channel_session_user_from_http


# This decorator copies the user from the HTTP session (only available in
# websocket.connect or http.request messages) to the channel session (available
# in all consumers with the same reply_channel, so all three here)
@channel_session_user_from_http
def ws_connect(message):
    message.reply_channel.send({"accept": True})
    message.channel_session['rooms'] = []
User disconnects from the websocket
When a user disconnects from the websocket, we need to clean up his opening session. To identify the user, we’ll need the channel_session_user which adds user instance to the received message, based on the user ID from the channel session. Unlike channel_session_user_from_http, it turns on channel session implicitly.
In order to provide a possibility to send a message to all users who are in a particular room, django-channels provides an excellent opportunity to group channels (more details here).
Let’s add the models Room method websocket_group, which will return a unique channels.Group for each room through id:
# ...
from channels import Group


@python_2_unicode_compatible
class Room(models.Model):
    # ...

    @property
    def websocket_group(self):
        """
        Returns the Channels Group that sockets should subscribe to to get sent
        messages as they are generated.
        """
        return Group("room-%s" % self.id)
Now let’s add the following lines into chat/consumers.py:
from channels.auth import channel_session_user_from_http, channel_session_user

from .models import Room
# ...

@channel_session_user
def ws_disconnect(message):
    # Unsubscribe from any connected rooms
    for room_id in message.channel_session.get("rooms", set()):
        try:
            room = Room.objects.get(pk=room_id)
            # Removes us from the room's send group. If this doesn't get run,
            # we'll get removed once our first reply message expires.
            room.websocket_group.discard(message.reply_channel)
        except Room.DoesNotExist:
            pass
Message Processing
For comfortable work we will send the data in the form of json, so when you receive a message, we will parse json, and send the received data into the channel.
Let’s add the following lines into chat/consumers.py:
import json

from channels import Channel
# ...

# Unpacks the JSON in the received WebSocket frame and puts it onto a channel
# of its own with a few attributes extra so we can route it
# This doesn't need @channel_session_user as the next consumer will have that,
# and we preserve message.reply_channel (which that's based on)
def ws_receive(message):
    # All WebSocket frames have either a text or binary payload; we decode the
    # text part here assuming it's JSON.
    # You could easily build up a basic framework that did this encoding/decoding
    # for you as well as handling common errors.
    payload = json.loads(message['text'])
    payload['reply_channel'] = message.content['reply_channel']
    Channel("chat.receive").send(payload)
User logged into the chat
One of the important features of our app is the ability to enter a specific chat room, but what will happen if an unauthorized user tries to do it? and what if the requested room does not exist? or if the user has no rights to enter this room at all? That's right, an error will occur! And in the first two cases, it will clearly be thrown at the system level, and in the third case the user will likely get to the secret room. To prevent such a trouble from happening, you need to add error handling.
Let's create chat/exceptions.py file and declare ClientError class in it:
import json


class ClientError(Exception):
    """
    Custom exception class that is caught by the websocket receive()
    handler and translated into a send back to the client.
    """
    def init(self, code):
        super(ClientError, self).init(code)
        self.code = code

    def send_to(self, channel):
        channel.send({
            "text": json.dumps({
                "error": self.code,
            }),
        })
In the future, if any error occurs, when using this class we will notify the client-side. Now let's create chat/utils.py and declare decorators needed for error handling there.
from functools import wraps

from .exceptions import ClientError
from .models import Room


def catch_client_error(func):
    """
    Decorator to catch the ClientError exception and translate it into a reply.
    """
    @wraps(func)
    def inner(message, args, **kwargs):
        try:
            return func(message, args, **kwargs)
        except ClientError as e:
            # If we catch a client error, tell it to send an error string
            # back to the client on their reply channel
            e.send_to(message.reply_channel)
    return inner


def get_room_or_error(room_id, user):
    """
    Tries to fetch a room for the user, checking permissions along the way.
    """
    # Check if the user is logged in
    if not user.is_authenticated():
        raise ClientError("USER_HAS_TO_LOGIN")
    # Find the room they requested (by ID)
    try:
        room = Room.objects.get(pk=room_id)
    except Room.DoesNotExist:
        raise ClientError("ROOM_INVALID")
    # Check permissions
    if room.staff_only and not user.is_staff:
        raise ClientError("ROOM_ACCESS_DENIED")
    return room
Since we want to notify users about something, let's add some gradation of messages by a level of importance. To do this, let's create a chat/settings.py, where we define the types of messages:
from django.conf import settings

NOTIFY_USERS_ON_ENTER_OR_LEAVE_ROOMS = getattr(settings, 'NOTIFY_USERS_ON_ENTER_OR_LEAVE_ROOMS', True)

MSG_TYPE_MESSAGE = 0  # For standard messages
MSG_TYPE_WARNING = 1  # For yellow messages
MSG_TYPE_ALERT = 2  # For red & dangerous alerts
MSG_TYPE_MUTED = 3  # For just OK information that doesn't bother users
MSG_TYPE_ENTER = 4  # For just OK information that doesn't bother users
MSG_TYPE_LEAVE = 5  # For just OK information that doesn't bother users

MESSAGE_TYPES_CHOICES = getattr(settings, 'MESSAGE_TYPES_CHOICES', (
    (MSG_TYPE_MESSAGE, 'MESSAGE'),
    (MSG_TYPE_WARNING, 'WARNING'),
    (MSG_TYPE_ALERT, 'ALERT'),
    (MSG_TYPE_MUTED, 'MUTED'),
    (MSG_TYPE_ENTER, 'ENTER'),
    (MSG_TYPE_LEAVE, 'LEAVE')))

MESSAGE_TYPES_LIST = getattr(settings, 'MESSAGE_TYPES_LIST',
                             [MSG_TYPE_MESSAGE,
                              MSG_TYPE_WARNING,
                              MSG_TYPE_ALERT,
                              MSG_TYPE_MUTED,
                              MSG_TYPE_ENTER,
                              MSG_TYPE_LEAVE])
Also, we will need a simple way to deliver a message of any content to all users connected to this room. To do this, let’s add the send_message method the Room class, after that it will be as follows:
import json
from django.db import models
from django.utils.six import python_2_unicode_compatible
from channels import Group

from .settings import MSG_TYPE_MESSAGE


@python_2_unicode_compatible
class Room(models.Model):
    """
    A room for people to chat in.
    """
    title = models.CharField(max_length=255)
    staff_only = models.BooleanField(default=False)

    def str(self):
        return self.title

    @property
    def websocket_group(self):
        """
        Returns the Channels Group that sockets should subscribe to to get sent
        messages as they are generated.
        """
        return Group("room-%s" % self.id)

    def send_message(self, message, user, msg_type=MSG_TYPE_MESSAGE):
        """
        Called to send a message to the room on behalf of a user.
        """
        final_msg = {'room': str(self.id), 'message': message, 'username': user.username, 'msg_type': msg_type}

        # Send out the message to everyone in the room
        self.websocket_group.send(
            {"text": json.dumps(final_msg)}
        )
Add the following lines into chat/consumers.py:
# Channel_session_user loads the user out from the channel session and presents
# it as message.user. There's also a http_session_user if you want to do this on
# a low-level HTTP handler, or just channel_session if all you want is the
# message.channel_session object without the auth fetching overhead.
@channel_session_user
@catch_client_error
def chat_join(message):
    # Find the room they requested (by ID) and add ourselves to the send group
    # Note that, because of channel_session_user, we have a message.user
    # object that works just like request.user would. Security!
    room = get_room_or_error(message["room"], message.user)

    # Send a "enter message" to the room if available
    if NOTIFY_USERS_ON_ENTER_OR_LEAVE_ROOMS:
        room.send_message(None, message.user, MSG_TYPE_ENTER)

    # OK, add them in. The websocket_group is what we'll send messages
    # to so that everyone in the chat room gets them.
    room.websocket_group.add(message.reply_channel)
    message.channel_session['rooms'] = list(set(message.channel_session['rooms']).union([room.id]))
    # Send a message back that will prompt them to open the room
    # Done server-side so that we could, for example, make people
    # join rooms automatically.
    message.reply_channel.send({
        "text": json.dumps({
            "join": str(room.id),
            "title": room.title,
        }),
    })
User left the chat
Let’s add the following lines into chat/consumers.py:
@channel_session_user
@catch_client_error
def chat_leave(message):
    # Reverse of join - remove them from everything.
    room = get_room_or_error(message["room"], message.user)

    # Send a "leave message" to the room if available
    if NOTIFY_USERS_ON_ENTER_OR_LEAVE_ROOMS:
        room.send_message(None, message.user, MSG_TYPE_LEAVE)

    room.websocket_group.discard(message.reply_channel)
    message.channel_session['rooms'] = list(set(message.channel_session['rooms']).difference([room.id]))
    # Send a message back that will prompt them to close the room
    message.reply_channel.send({
        "text": json.dumps({
            "leave": str(room.id),
        }),
    })
User sent a message
Let’s add the following lines to chat/consumers.py:
@channel_session_user
@catch_client_error
def chat_send(message):
    if int(message['room']) not in message.channel_session['rooms']:
        raise ClientError("ROOM_ACCESS_DENIED")

    room = get_room_or_error(message["room"], message.user)
    room.send_message(message["message"], message.user)
Connecting handlers
After previous actions our chat/consumers.py should look as follows:
import json

from channels import Channel
from channels.auth import channel_session_user_from_http, channel_session_user

from .settings import MSG_TYPE_LEAVE, MSG_TYPE_ENTER, NOTIFY_USERS_ON_ENTER_OR_LEAVE_ROOMS
from .models import Room
from .utils import get_room_or_error, catch_client_error
from .exceptions import ClientError


@channel_session_user_from_http
def ws_connect(message):
    message.channel_session['rooms'] = []


def ws_receive(message):
    payload = json.loads(message['text'])
    payload['reply_channel'] = message.content['reply_channel']
    Channel("chat.receive").send(payload)


@channel_session_user
def ws_disconnect(message):
    for room_id in message.channel_session.get("rooms", set()):
        try:
            room = Room.objects.get(pk=room_id)
            room.websocket_group.discard(message.reply_channel)
        except Room.DoesNotExist:
            pass


@channel_session_user
@catch_client_error
def chat_join(message):
    room = get_room_or_error(message["room"], message.user)

    if NOTIFY_USERS_ON_ENTER_OR_LEAVE_ROOMS:
        room.send_message(None, message.user, MSG_TYPE_ENTER)

    room.websocket_group.add(message.reply_channel)
    message.channel_session['rooms'] = list(set(message.channel_session['rooms']).union([room.id]))
    message.reply_channel.send({
        "text": json.dumps({
            "join": str(room.id),
            "title": room.title,
        }),
    })


@channel_session_user
@catch_client_error
def chat_leave(message):
    room = get_room_or_error(message["room"], message.user)

    if NOTIFY_USERS_ON_ENTER_OR_LEAVE_ROOMS:
        room.send_message(None, message.user, MSG_TYPE_LEAVE)

    room.websocket_group.discard(message.reply_channel)
    message.channel_session['rooms'] = list(set(message.channel_session['rooms']).difference([room.id]))
    message.reply_channel.send({
        "text": json.dumps({
            "leave": str(room.id),
        }),
    })


@channel_session_user
@catch_client_error
def chat_send(message):
    if int(message['room']) not in message.channel_session['rooms']:
        raise ClientError("ROOM_ACCESS_DENIED")
    room = get_room_or_error(message["room"], message.user)
    room.send_message(message["message"], message.user)
Let’s create chat/routing.py and add declared signals there:
from channels import route

from .consumers import ws_connect, ws_receive, ws_disconnect, chat_join, chat_leave, chat_send


# There's no path matching on these routes; we just rely on the matching
# from the top-level routing. We could path match here if we wanted.
websocket_routing = [
    # Called when WebSockets connect
    route("websocket.connect", ws_connect),

    # Called when WebSockets get sent a data frame
    route("websocket.receive", ws_receive),

    # Called when WebSockets disconnect
    route("websocket.disconnect", ws_disconnect),
]

# You can have as many lists here as you like, and choose any name.
# Just refer to the individual names in the include() function.
custom_routing = [
    # Handling different chat commands (websocket.receive is decoded and put
    # onto this channel) - routed on the "command" attribute of the decoded
    # message.
    route("chat.receive", chat_join, command="^join$"),
    route("chat.receive", chat_leave, command="^leave$"),
    route("chat.receive", chat_send, command="^send$"),
]
And now we’ll add routing that we have created in the main multichat/routing.py, after which it will look as follows multichat/routing.py:
from channels import include


# The channel routing defines what channels get handled by what consumers,
# including optional matching on message attributes. In this example, we match
# on a path prefix, and then include routing from the chat module.
channel_routing = [
    # Include sub-routing from an app.
    include("chat.routing.websocket_routing", path=r"^/chat/stream"),

    # Custom handler for message sending (see Room.send_message).
    # Can't go in the include above as it's not got a 'path' attribute to match on.
    include("chat.routing.custom_routing"),

    # A default "http.request" route is always inserted by Django at the end of the routing list
    # that routes all unmatched HTTP requests to the Django view system. If you want lower-level
    # HTTP handling - e.g. long-polling - you can do it here and route by path, and let the rest
    # fall through to normal views.
]
Chat!
We have written a lot of things on the backend, but where is the chat itself? So, let's create a front end part.
Firstly, we’ll create static/main.js, where we will be coding. Let’s connect it, also we will need jquery and any library to reconnect to websocket. In this example we will use ReconnectingWebSocket. We open our templates/index.html and append the following lines:
{# ... #}
{% load staticfiles %}
{# ... #}

{% block extra_body %}
  <script src="//cdnjs.cloudflare.com/ajax/libs/jquery/3.1.1/jquery.min.js"></script>
  <script src="//cdnjs.cloudflare.com/ajax/libs/reconnecting-websocket/1.0.0/reconnecting-websocket.min.js"></script>
  <script src="{% static "main.js" %}"></script>
{% endblock %}
And also do not forget to create several rooms, I'm sure that if you are reading this article, then you know how to use Django admin panel for sure :)
Now it is possible to code a chat, as we know, only the authorized user can get into this page, so we will not make any further checks in this regard (but if you decide to use this code in production, the additional check on the front end will be useful).
Connecting to the socket
Why do we use ReconnectingWebSocket? Everything is very simple. With this library, WebSocket will be automatically re-connected after calling the onclose event. I just want to note that reconnection does not start immediately, but with a small delay that can be adjusted by transmitting value in milliseconds to the designer of the reconnectInterval class. If you want, you can specify timeoutInterval. But will it work if we lose the connection? I don’t think so. :)
Let’s connect to our socket:
$(function () {
  // Correctly decide between ws:// and wss://
  var ws_scheme = window.location.protocol == "https:" ? "wss" : "ws";
  var ws_path = ws_scheme + '://' + window.location.host + "/chat/stream/";
  var socket = new ReconnectingWebSocket(ws_path);
});
Stop, stop, stop. This code will be difficult to debug, let's display in the event console, such as the attempt to connect, the client is successfully connected and disconnected from the socket. WebSocket provides the ability to define onopen and onclose methods, which will be called when the connection is successful, or when there is disconnection from the server. As a result, we get something like this:
$(function () {
  // Correctly decide between ws:// and wss://
  var ws_scheme = window.location.protocol == "https:" ? "wss" : "ws";
  var ws_path = ws_scheme + "://" + window.location.host + "/chat/stream/";
  console.log("Connecting to " + ws_path);
  var socket = new ReconnectingWebSocket(ws_path);

  // Helpful debugging
  socket.onopen = function () {
    console.log("Connected to chat socket");
  };
  socket.onclose = function () {
    console.log("Disconnected from chat socket");
  };
});
Let's open the console, reload the page and see what we've got. If you see the following lines, then life is good:
[Log] Connecting to ws://127.0.0.1:8000/chat/stream/ (main.js, line 5)
[Log] Connected to chat socket (main.js, line 10)
Connecting and disconnecting from the rooms
It's time to add the possibility to connect and disconnect from a particular room. We do not want to bother with page making, this article has purely training nature, so we will add the necessary elements directly from js. Is it good or bad? Within this training material - it is acceptable, especially when reading these lines, you understand that we are sorry for what we’ve done.
And so, as the WebSocket provides duplex communication, we can send data to a server, socket.send method is used for it. This method accepts any string and sends it through the WebSocket to the server. As you can remember, our message handler expects to receive JSON - let’s not disappoint it, we will wrap a dictionary with the data in JSON.stringify.
Let’s add the following code to the static/main.js:
// Says if we joined a room or not by if there's a div for it
inRoom = function (roomId) {
  return $("#room-" + roomId).length > 0;
};
// Room join/leave
$("li.room-link").click(function () {
  roomId = $(this).attr("data-room-id");
  if (inRoom(roomId)) {
    // Leave room
    $(this).removeClass("joined");
    socket.send(
      JSON.stringify({
        command: "leave", // determines which handler will be used (see chat/routing.py)
        room: roomId,
      })
    );
  } else {
    // Join room
    $(this).addClass("joined");
    socket.send(
      JSON.stringify({
        command: "join",
        room: roomId,
      })
    );
  }
});
Let's take a look at our Code carefully and think what we are lack of. There is no processing of responses from the server. It will help us in the onmessage event, whenever any kind of information is received, the socket.onmessage method will be called.
As a parameter it receives a message, and as you can remember, we expect to get valid json which we have to parse. Also, we should take into account the processing errors from the server, in this training material we will just show an error as an alert for a user. So, let’s add the following code:
socket.onmessage = function (message) {
  // Decode the JSON
  console.log("Got websocket message " + message.data);
  var data = JSON.parse(message.data);
  // Handle errors
  if (data.error) {
    alert(data.error);
    return;
  }
  // Handle joining
  if (data.join) {
    console.log("Joining room " + data.join);
    var roomdiv = $("" + "" + data.title + "" + "" + "Send" + "");
    $("#chats").append(roomdiv);
    // Handle leaving
  } else if (data.leave) {
    console.log("Leaving room " + data.leave);
    $("#room-" + data.leave).remove();
  } else {
    console.log("Cannot handle message!");
  }
};
You have the right to fully control the data returned in the response, see message.reply_channel.send in chat/consumers.py.
Let's check what we've got. Make sure that the console is open, refresh the page and try clicking once on the room button to connect to it and disconnect from it. Everything is fine, if you see the following lines in the console:
[Log] Connecting to ws://127.0.0.1:8000/chat/stream/ (main.js, line 5)
[Log] Connected to chat socket (main.js, line 71)
[Log] Got websocket message {"title": "room 1", "join": "1"} (main.js, line 10)
[Log] Joining room 1 (main.js, line 19)
[Log] Got websocket message {"room": "1", "username": "admin", "msg_type": 5, "message": null} (main.js, line 10)
[Log] Cannot handle message! (main.js, line 43)
[Log] Got websocket message {"leave": "1"} (main.js, line 10)
[Log] Leaving room 1 (main.js, line 40)
Sending and receiving messages
Our work with the chat proceeds, there is not much left to do - we will add the possibility to send and receive messages. We’ll begin with sending of course.
As you can see in the previous chapter, when we get the information from the server about the successful connection to the room, we add a form with an input field of the message text and a button to send it in our template. Now let's hung the submit event handler on it, with which we will send the text input field entered in WebSocket. Add the following code:
// ...
// Hook up send button to send a message
roomdiv.find("button").on("click", function () {
  socket.send(
    JSON.stringify({
      command: "send",
      room: data.join,
      message: roomdiv.find("input").val(),
    })
  );
  roomdiv.find("input").val("");
  return false;
});
// ...
I think that if you've read up to this point, then the code seems rather obvious and there is no need in further explanation.
We need to display messages received from users who are with us in the same room. Let’s renew our onmessage:
// ...
} else if (data.message || data.msg_type != 0) {
  var msgdiv = $("#room-" + data.room + " .messages");
  var ok_msg = "";
  // msg types are defined in chat/settings.py
  // Only for demo purposes is hardcoded, in production scenarios, consider call a service.
  switch (data.msg_type) {
    case 0:
      // Message
      ok_msg = "" +
        "" + data.username + "" +
        "" + data.message + "" +
        "";
      break;
    case 1:
      // Warning/Advice messages
      ok_msg = "" + data.message + "";
      break;
    case 2:
      // Alert/Danger messages
      ok_msg = "" + data.message + "";
      break;
    case 3:
      // "Muted" messages
      ok_msg = "" + data.message + "";
      break;
    case 4:
      // User joined room
      ok_msg = "" + data.username + " joined the room!" + "";
      break;
    case 5:
      // User left room
      ok_msg = "" + data.username + " left the room!" + "";
      break;
    default:
      console.log("Unsupported message type!");
      return;
  }
  msgdiv.append(ok_msg);
  msgdiv.scrollTop(msgdiv.prop("scrollHeight"));
} else {
// ...
The final static/main.js will look like this:
$(function () {
  // Correctly decide between ws:// and wss://
  var ws_scheme = window.location.protocol == "https:" ? "wss" : "ws";
  var ws_path = ws_scheme + "://" + window.location.host + "/chat/stream/";
  console.log("Connecting to " + ws_path);
  var socket = new ReconnectingWebSocket(ws_path);

  // Helpful debugging
  socket.onopen = function () {
    console.log("Connected to chat socket");
  };
  socket.onclose = function () {
    console.log("Disconnected from chat socket");
  };

  socket.onmessage = function (message) {
    // Decode the JSON
    console.log("Got websocket message " + message.data);
    var data = JSON.parse(message.data);
    // Handle errors
    if (data.error) {
      alert(data.error);
      return;
    }
    // Handle joining
    if (data.join) {
      console.log("Joining room " + data.join);
      var roomdiv = $("" + "" + data.title + "" + "" + "Send" + "");
      $("#chats").append(roomdiv);
      roomdiv.find("button").on("click", function () {
        socket.send(
          JSON.stringify({
            command: "send",
            room: data.join,
            message: roomdiv.find("input").val(),
          })
        );
        roomdiv.find("input").val("");
      });
      // Handle leaving
    } else if (data.leave) {
      console.log("Leaving room " + data.leave);
      $("#room-" + data.leave).remove();
    } else if (data.message || data.msg_type != 0) {
      var msgdiv = $("#room-" + data.room + " .messages");
      var ok_msg = "";
      // msg types are defined in chat/settings.py
      // Only for demo purposes is hardcoded, in production scenarios, consider call a service.
      switch (data.msg_type) {
        case 0:
          // Message
          ok_msg = "" + "" + data.username + "" + "" + data.message + "" + "";
          break;
        case 1:
          // Warning/Advice messages
          ok_msg = "" + data.message + "";
          break;
        case 2:
          // Alert/Danger messages
          ok_msg = "" + data.message + "";
          break;
        case 3:
          // "Muted" messages
          ok_msg = "" + data.message + "";
          break;
        case 4:
          // User joined room
          ok_msg = "" + data.username + " joined the room!" + "";
          break;
        case 5:
          // User left room
          ok_msg = "" + data.username + " left the room!" + "";
          break;
        default:
          console.log("Unsupported message type!");
          return;
      }
      msgdiv.append(ok_msg);
      msgdiv.scrollTop(msgdiv.prop("scrollHeight"));
    } else {
      console.log("Cannot handle message!");
    }
  };

  // Says if we joined a room or not by if there's a div for it
  function inRoom(roomId) {
    return $("#room-" + roomId).length > 0;
  }

  // Room join/leave
  $("li.room-link").click(function () {
    roomId = $(this).attr("data-room-id");
    if (inRoom(roomId)) {
      // Leave room
      $(this).removeClass("joined");
      socket.send(
        JSON.stringify({
          command: "leave", // determines which handler will be used (see chat/routing.py)
          room: roomId,
        })
      );
    } else {
      // Join room
      $(this).addClass("joined");
      socket.send(
        JSON.stringify({
          command: "join",
          room: roomId,
        })
      );
    }
  });
});
In it we are trying to define a user’s message, and depending on the type, display the message.
Well, that's all, our chat is ready and it even can be used. :)
All code shown in this tutorial material was taken from here, it has only minor cosmetic changes.
Also you can find it in our repository.
Conclusion
The django-channels framework is designed to simplify the developer's life, bringing the WebSockets and HTTP2 support in the world of simple and ordinary HTTP 1.1. Using this library allows to standardize the communication with WebSocket, and standardization of our work is very important. Among other things, this library allows horizontal scaling, as well as does not create any problems associated with asynchrony.
Subscribe for the news and updates
This article demonstrates how to use Python to automate yield calculations in decentralized finance (DeFi), focusing on the Renzo and Pendle platforms. It guides readers through estimating potential rewards based on factors like token prices, liquidity, and reward distribution rules, emphasizing the importance of regular data updates and informed decision-making in DeFi investments.

This article explores how Stoic principles can be applied in the workplace to navigate stress, improve self-control, and focus on what truly matters, with practical examples from the author’s experience in software development.

In the previous article, we learned about test analysis for a product in general, and now we are ready to go further and look at test analysis for specific features.

We reviewed the best payment gateways in 2020. Here’s our comparison of their features, advantages, and disadvantages.

This article is aimed for beginners, who are trying to choose between Ruby on Rails and Django. Let’s see which is fastest and why.
In my current project I had a task to use twitter API. Twitter uses OAuth for authentication, which is pretty dreary. To avoid fiddling with it all the time, I've moved authentication to decorator. If key is available - nothing happens, just view is launched as usual. It's convenient that there's no need for additional twitter settings in user profile. Code is in article.