

One of our recent projects includes the functionality of an inline code editor. This code editor needed to be highly extensible and have custom features. To address this, we chose Codemirror v6 due to its peculiar architecture - it is highly customizable, and all the additional features are provided into codemirror engine as Extension objects.
To integrate it into a React application, we used Rodemirror. It is very flexible, allowing us to simply pass CodeMirror extensions from the outer environment (e.g. components higher up in the hierarchy).
Because of these libraries, instantiating a code editor is almost as simple as a regular controlled input:
export const BaseCodeEditor: FunctionComponent = ({value, onUpdate, extensions, ...rest}) => (
This basic codemirror component can be used by more components that represent some business logic. Something like this:
export const PythonCodeEditor: FunctionComponent = (props) => {
// https://github.com/codemirror/lang-python
const pythonLanguageExtensions = useMemo(() => [pythonLanguage], [])
return And there can be dozens of components like PythonCodeEditor, because there may be different places in your system that require different business logic. This way of structuring the code seemed quite convenient to us. However, we had to face a serious challenge.
Testing
There are several ways to test React code. First, we tried using Jest, assuming that we can test codemirror just like we would any ordinary html input. However, here we bumped into an issue. Under the hood, codemirror is not an html input.
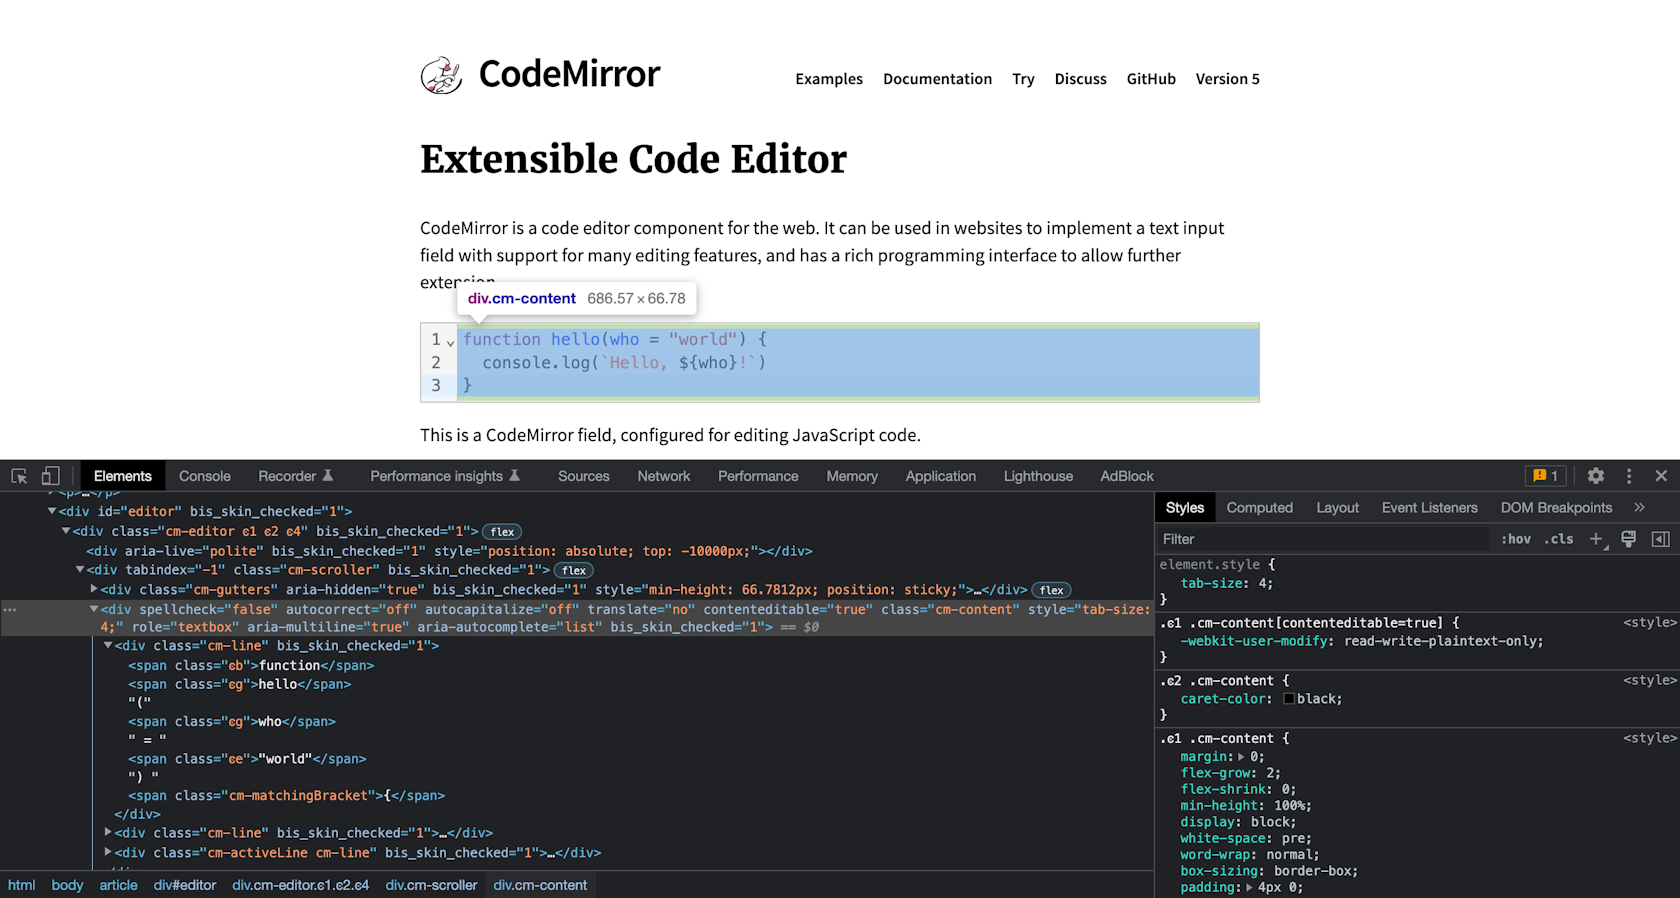
As you can see, the DOM node that first-hand contains content typed by user, is
Testing codemirror without React
As you may have noticed, codemirror is actually framework agnostic and has no attachments to any component-rendering library. So, the most minimalistic option might be to test codemirror as a set of javascript classes and functions. You could even reference codemirror repositories to check how to write tests as intended.
However, there is a large con that prevented us from using this approach: we had several very specific code editor components for different purposes. They all had some customization that could be applied, but still, a lot of logic was associated directly with the component. We still could test separate extensions, but they did not feel complete until the entire code block was executed, as it would be in a real runtime. Thus, we did not use this approach. However, if your use case will include a single entirely customizable component, testing only a codemirror class and its settings is a solid option.
End-to-end tests
Adding some Selenium/Cypress suites was the easiest way to cover codemirror with tests, and it is quite normal to have some kind of smoke tests for the bare minimum of features. But you certainly do not want to cover all corner-cases of your codemirror code with e2e-tests. This will bloat run time of your CI to hours. So, even though we had some e2e tests over codemirror, we kept looking for a more efficient way to test it.
Alternative environment for jest
One possible solution is to replace jsdom with a more sophisticated alternative like Jest-Puppeteer. Potentially this allows to bypass limitations that jsdom has. However, we haven't explored this option too much for the following reasons:
Despite being launched using the same runner, the test syntax is dramatically different. Does it make sense to use the same tool if it is used in a completely unfamiliar way?
Some libraries may not allow you to easily swap test environments. For instance, if your project is powered by react-scripts, it will not just let you reconfigure: react-scripts will notify you that this is the only intended way to eject your project out of react-scripts infrastructure. Thus, it seemed strongly unintentional.
Potentially it might slow down the performance of jest tests, since jsdom is way lighter than puppeteer.
The hybrid option we are using
The option described below, we found quite effective. We are currently using it and found no restrictions on what codemirror features we could test. In order to understand what exactly we are doing, I have to explain how Rodemirror organized its component. Basically, it contains a reference to Javascript object instance that represents codemirror. This view object is the main instance that encompasses all the codemirror logic. It accepts state, reference to DOM node and (indirectly) list of our custom extensions. How it looks in unchanged Rodemirror code:
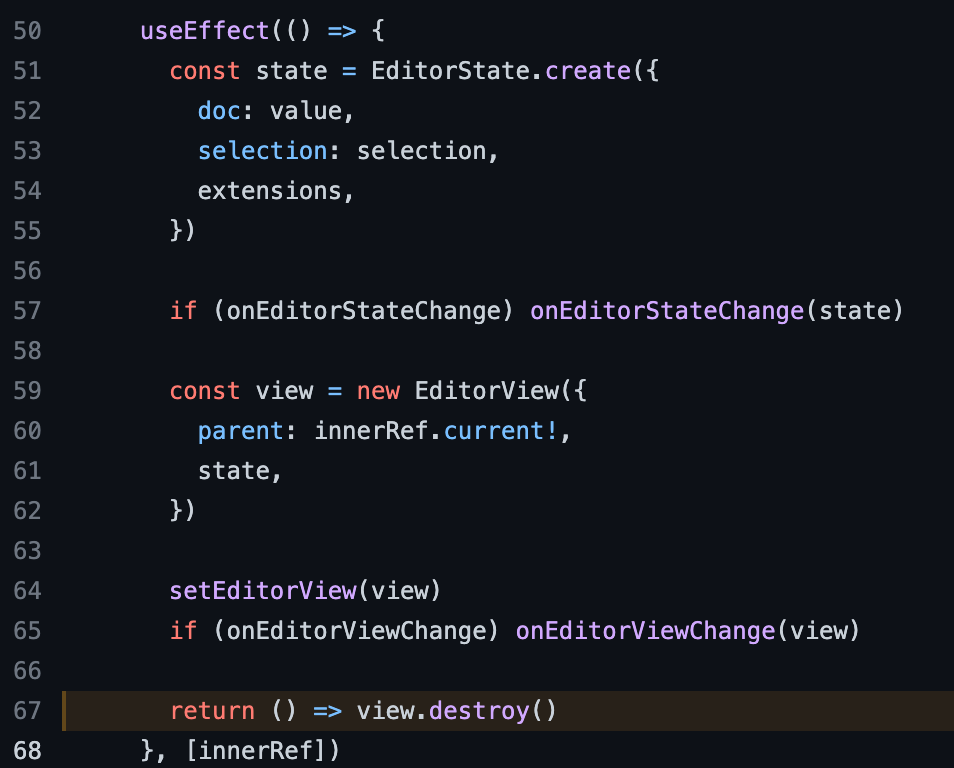
If we go back to tests written inside codemirror repos, you will notice the majority of manipulations are conducted with this view instance. One peculiar thing about this is that the content is manually set inside the DOM node, then manually applied to trigger codemirror change detection, and this will serve as an emulation of user input. The only thing that prevents us from doing this is that view is an object available only inside CodeMirror component. So, how could we make use of it for our cases? Here is what we came up with:
export type CodeMirrorProps = {
  // some other props
  onEditorViewInit?: (editorView: EditorView) => void;
};

const CodeMirror = forwardRef<HTMLDivElement, CodeMirrorProps>(
  ({ onEditorViewInit, ...rest }, ref) => {
    const editorView = useRef<EditorView>();
    // something else...

    useEffect(() => {
      const state = EditorState.create({
        doc: value,
        selection: selection,
        extensions,
      });

      if (onEditorStateChange) onEditorStateChange(state);

      const editorView.current = new EditorView({
        parent: innerRef.current!,
        state,
      })
      if (onEditorViewInit) {
        onEditorViewInit(editorView.current)
      }

      return () => editorView.current.destroy();
    }, [innerRef]);

    // something else...
  },
);
We introduce a new property - onEditorViewInit. So, when it is time to initialize view, we are able to store the reference to it somewhere outside. Also, this will not affect the production code.
And here is how it could be used:
test("CodeMirror should run onUpdate when content is changed", () => {
  let editor!: EditorView;
  const handleUpdate = jest.fn();
  const { queryByText } = render(
    <CodeMirror
      value="foo"
      onEditorViewInit={(editorView) => {
        editor = editorView;
      }}
      onUpdate={(update) => {
        if (update.docChanged) {
          handleUpdate(update.state.doc.toString());
        }
      }}
    />
  );

  editor.domAtPos(1).node.nodeValue = "froo";
  // @ts-expect-error
  editor.observer.flush();

  expect(editor.state.doc.toString()).toBe("froo");
  expect(queryByText("foo")).not.toBeInTheDocument();
  expect(queryByText("froo")).toBeInTheDocument();
  expect(handleUpdate).toHaveBeenCalledWith("froo");
});
Here we can trigger change detection after we manually put the value into codemirror DOM element. However, this has some limitations: you just “dump“ all the text at once, like putting clipboard to input. For some cases you need to emulate input one key per user action:
test("AutocompleteCodeMirror should run autocomplete for if value is updated", async () => {
  let editor!: EditorView;
  const handleAutocomplete = jest.fn(
    (request: AutocompleteRequest): Promise<AutocompleteResponse> => {
      if (request.expression === "prin") {
        return Promise.resolve({
          result: [{ label: "print", type: "function" }],
        });
      }
      return Promise.resolve({ result: [] });
    }
  );
  renderComponent({
    value: "=",
    onEditorViewInit: (editorView) => {
      editor = editorView;
    },
    getAutocomplete: handleAutocomplete,
  });

  // global functions
  await act(async () => {
    type(editor, "prin");
    await new Promise((r) => setTimeout(r, 100));
  });

  expect(handleAutocomplete).toHaveBeenCalledWith({
    expression: "prin",
    cursorPosition: 4,
  });
  expect(
    document.getElementsByClassName("cm-tooltip-autocomplete")[0]
  ).toBeInTheDocument();
});

export const type = (view: EditorView, text: string) => {
  let cur = view.state.selection.main.head;

  [...text].forEach((char) => {
    view.dispatch({
      changes: { from: cur, insert: char },
      selection: { anchor: cur + char.length },
      userEvent: "input.type",
    });
  });
};
Here we can trigger autocomplete which listens for each key input and runs http call. AutocompleteCodeMirror is a custom component that implements autocomplete integration with codemirror and accepts a handler function that provides autocomplete values to codemirror instance.
This allows you to take any component that uses codemirror and cover it with tests not as a javascript class, but as a React component - exactly as it will be provided to your end user.
Conclusion
Covering your code with fast and comprehensive tests is just as important as writing clean and understandable code. Therefore, it's a good idea to take the time to find ways to test your features, even if it seems impossible at first.
I hope the story we shared will help you solve your unit testing problems, or at least inspire you to find ways to improve your code coverage with tests. Happy coding!
Subscribe for the news and updates
This article explores Figma’s Dev Mode, a tool that streamlines design-to-code translation by enabling precise inspection, automated code generation, and seamless integration with design systems.

Dive into our guide to RESTful API best practices

We reviewed the best payment gateways in 2020. Here’s our comparison of their features, advantages, and disadvantages.
There are two most popular web frameworks in Python. There is the Django with lots of intelligent defaults and the Flask micro framework with complete freedom in the choice of modules. Let’s see, what django vs flask is in 2017.

Quite often we have to write paginated or filtered blocks of information on page. I created a decorator that would automate this process.
There was a task to submit form with ajax, with server side validation of course. Obvious solution is to do validation and return json with erros. I didn't like idea of writing separate view for validation and then inserting errors in form html on client side. Especially since I already had a generic template for django form with errors display. In this article I'll describe how I solved the task.